Tamiya 1300 1966
Volkswagen Beetle
1/24 scale

by Brad Huskinson

1/24 Tamiya 1300 1966 VW Beetle
Kit #: Tamiya TAM24136
The Story Behind the Build
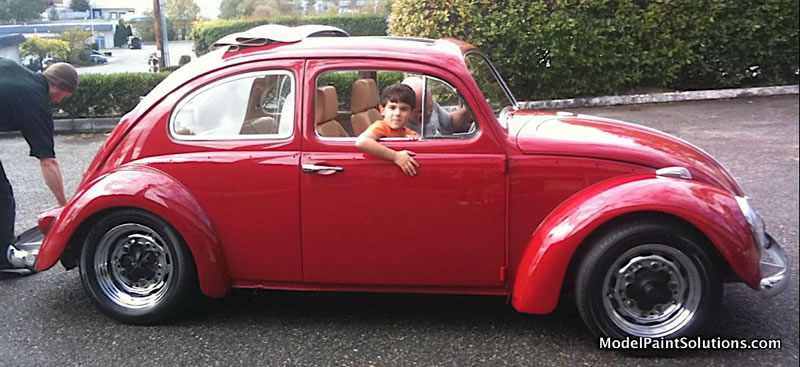
This project began as a surprise 60th birthday present for John Miller (Mr. Model Paint Solutions aka, Dr. Strangebrush). This was in March 2023. John used to own a stunning 1960 VW Beetle that had been restoredto perfection by a personal friend that is a master mechanic. The car had a beautiful paint job, complete engine rebuild, interior updates, and the list goes on… John sold the car against his better judgement.
My goal was to make a tribute car, not an exact replica.
In October of 2022 I asked John’s wife if she had any pictures of the car. She said she did, but they turned out to be from before or during the restoration.
One day John was telling a me all about the car and I asked him if he had any pictures of it because it sounded beautiful. I had never seen it myself. He said he did, looked on his computer but couldn’t find any. I contacted a mutual friend of ours, who also had a similar Beetle, so he could tell me all about John’s car.
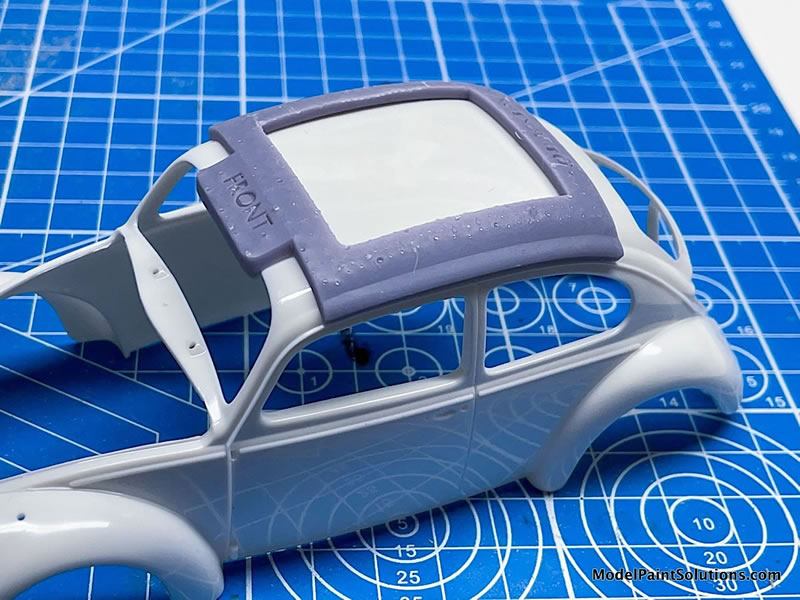
This was some help, but I needed stronger visuals to flesh out the project. For example, John’s car had a soft, retractable, 3/4 sunroof. I found Leos Hobbies on Facebook, who 3-D printed these. Perfect!!

Needless to say I was very uncomfortable building this car with so little information, especially for the best model maker that I know and the guy owned the 1:1 version. I tried over the next 16 months to find out as much as possible. A little math and you can see that I drastically missed his 60th birthday.
The aforementioned mutual friend texted me in late February of this year (2024) and said John’s beloved VW was at the Porsche shop that had restored it. I contacted the shop and asked if I could come by and take extensive photos for my project. They were extremely welcoming and were able to give me the exact paint color and other pertinent facts I needed. Whew!
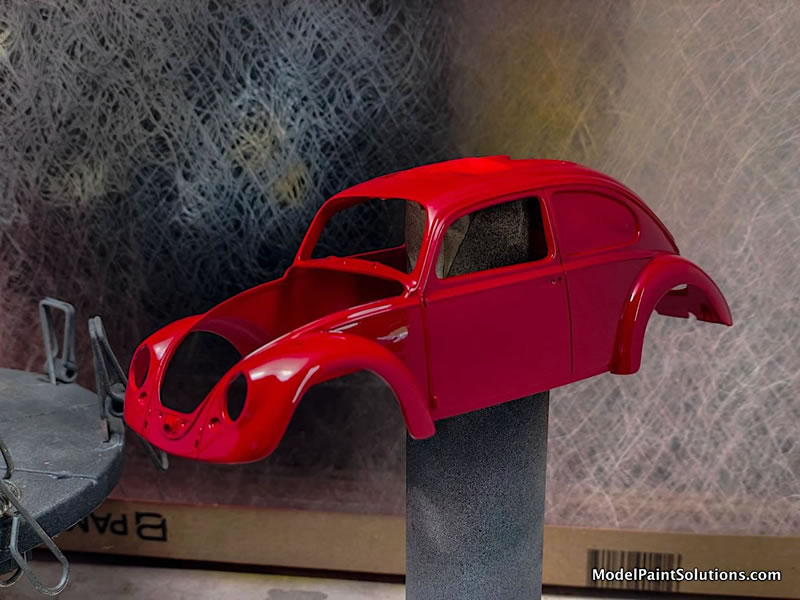
I had the kit way back in 2022, but was only really sure of the folding sunroof. So I cut the hole in the roof for it in August 2023, primed and painted the body and it sat until March of 2024. The body was painted the color I was told that it was, which turned out to be close but not close enough. Harrumph!
Construction Notes
All parts are removed from the sprue with the best sprue cutters (Godhands), and cleaned up with sandpaper, sanding sticks, and a new addition, a ceramic bladed scraper. The ceramic scraper works great for removing mold lines and reduces the amount of sanding time considerably. X-Acto knives were also used along with panel line cutters. Scalpels were used as well. The curved blade works really well for following seam lines and edges as well as for cutting tape masks and Bare Metal Foil, etc. Similarly painted parts were grouped together to save painting and cleanup time.
The Kit
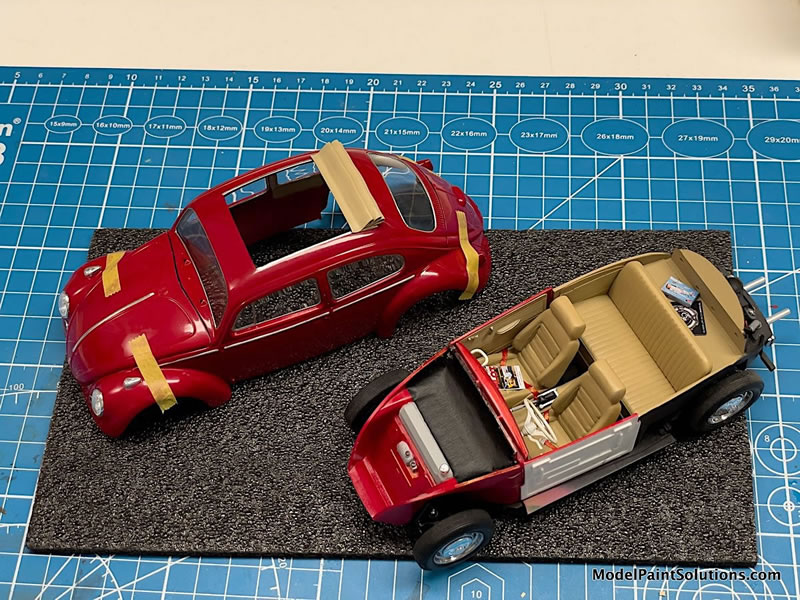
This Tamiya kit fit together quite well except for the side windows which were warped and a bit of a struggle. Also getting the body down snug over the interior to the chassis.
Sticky Stuff
I use Tamiya Thin for unpainted parts and several different CA glues for parts that had been painted. Occasionally I will use white glue for certain applications involving paper based items. Testors Clear Parts Cement was used for windows and other clear parts.
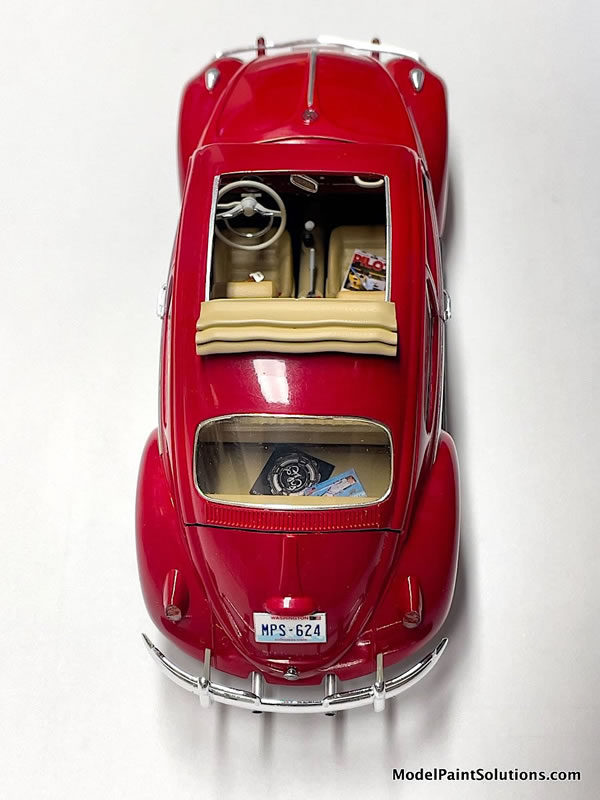
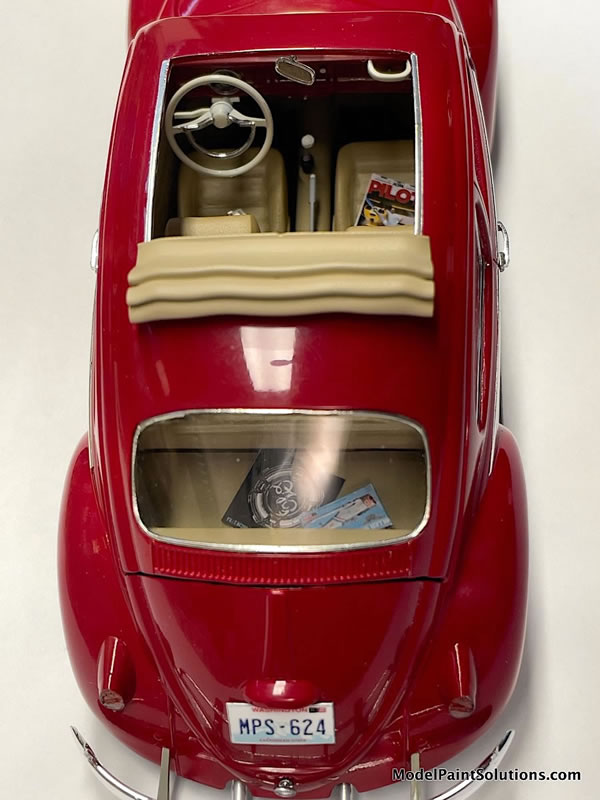
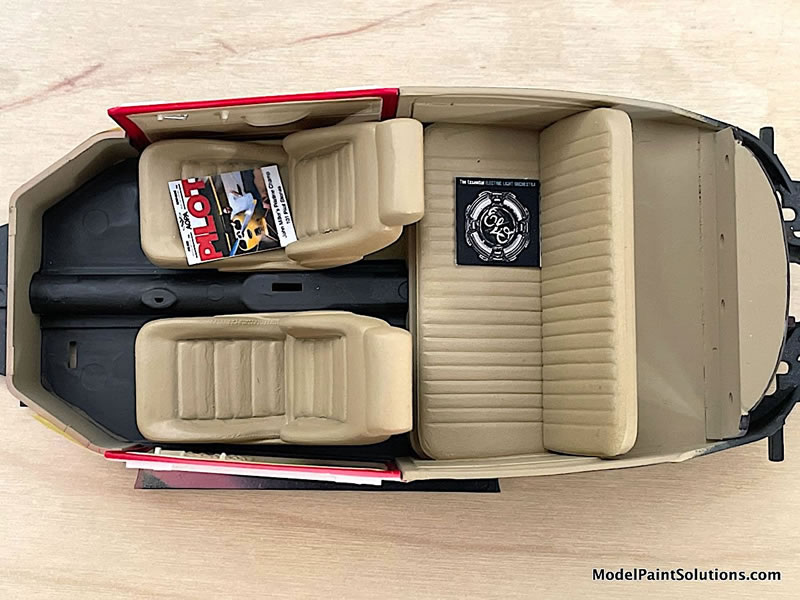
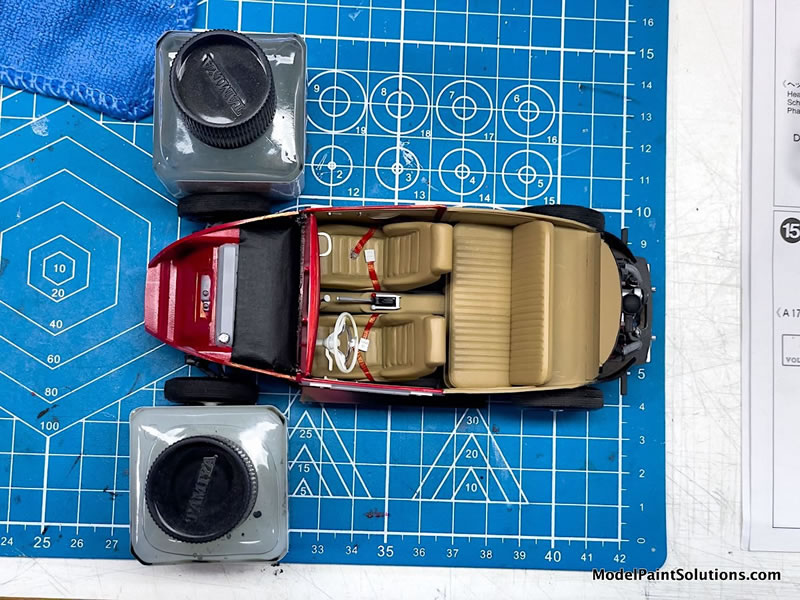
Interior
The interior on the 1:1 was modified. Custom SCAT seats had replaced the originals. I looked online for some 3D-printed seats, but couldn’t find anything close. Time to start looking through my stash and came very close with seats from a Ferrari Testarossa kit I had already raided. I filled half to the seat seams with sprue goo to better represent the SCAT seats. Seat backs which weren’t needed in the Ferrari were made from Evergreen styrene.
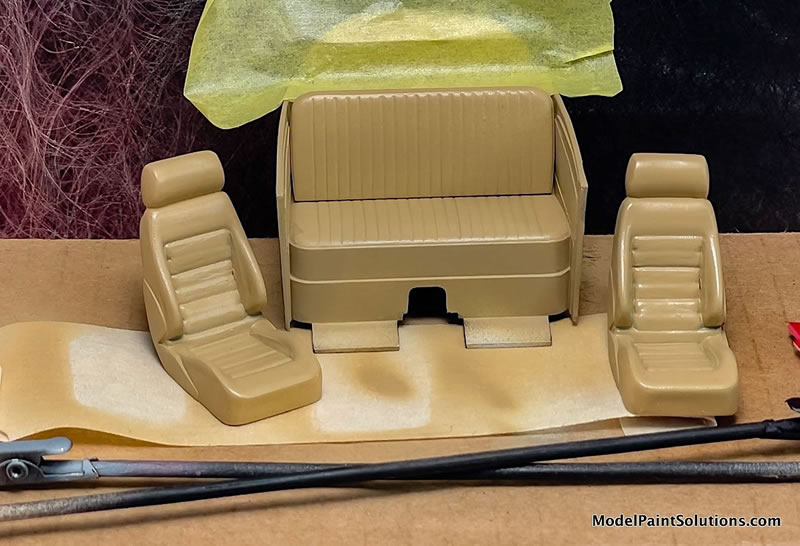
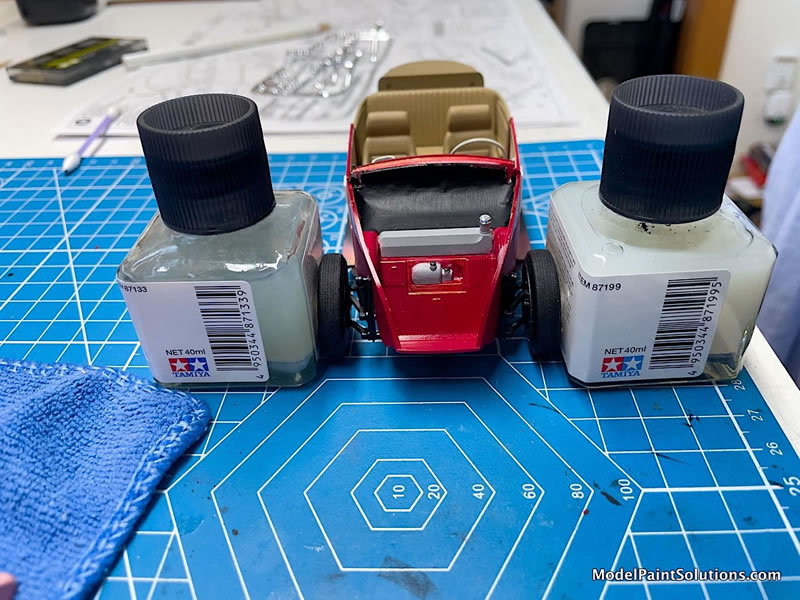
I mixed up a combo of Tamiya XF55 and XF59 50% each thinned with AK High Compatibility thinner for a 50% paint to thinner ratio and then airbrushed.
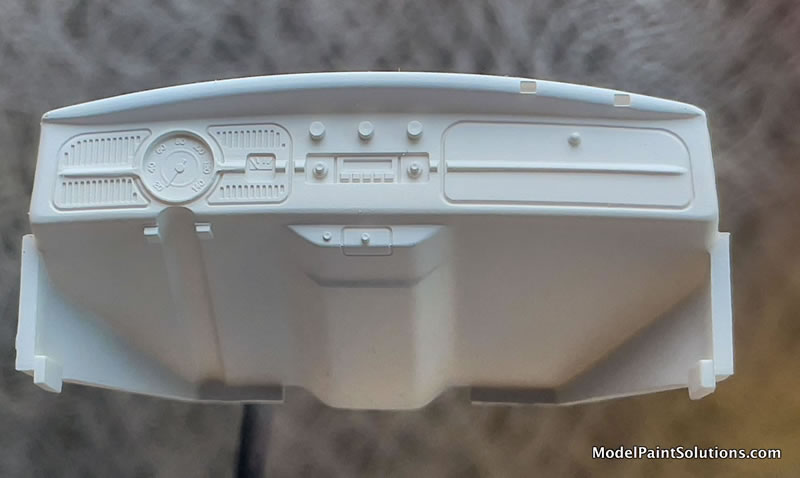
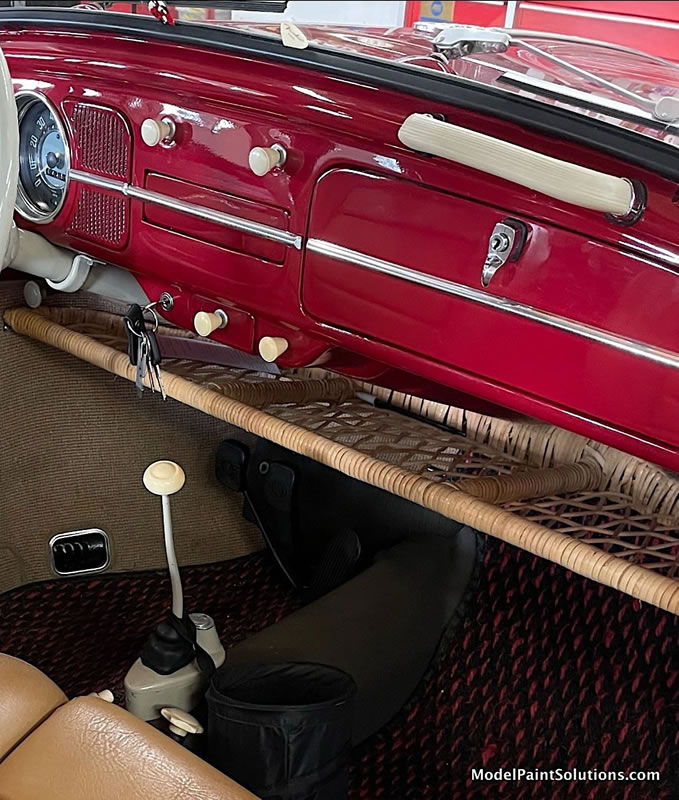
The dashboard needed the radio removed and filled in and a thin trim line was needed to match what was already there. The door side panels in the 1:1 are two tone, so I painted lighter in the center area by adding some white to the seat color paint. I also used the lighter color for the headliner. The door panels were inset in a body colored door, so that needed to be masked accordingly.
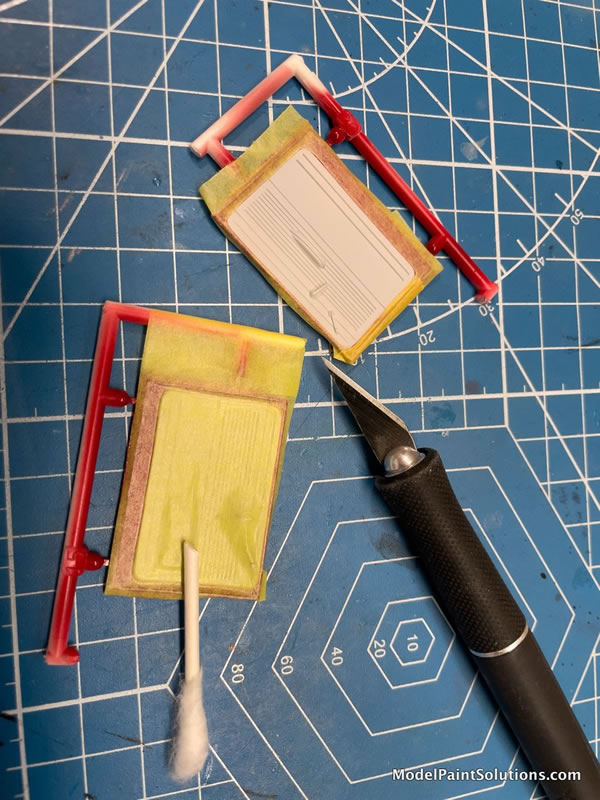
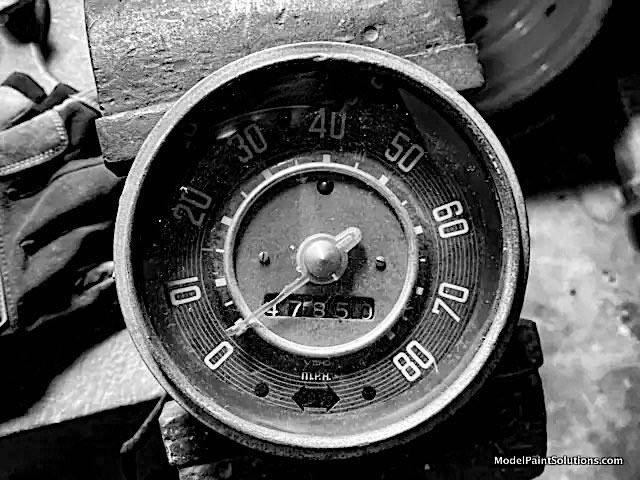
The speedometer in a 1960 was different from what was in the kit. So I found a 1960 VW VDO speedometer image online, printed it, cut it out and put it the speedometer indent in the dashboard. After the glue had dried, I filled the speedometer area with Bob Smith 5-minute 2-part epoxy. I kept putting a small amount over the image with a toothpick until it was flush with the surface of the chrome ring around the gauge.
The steering wheel, dash board knobs, shift knob and grab bar on the dash were a much whiter color than anything else and were painted with a combo of AK Flat White 3/1 AK Creamy White and thinned with AK High Compatibility thinner.
IMG_5582
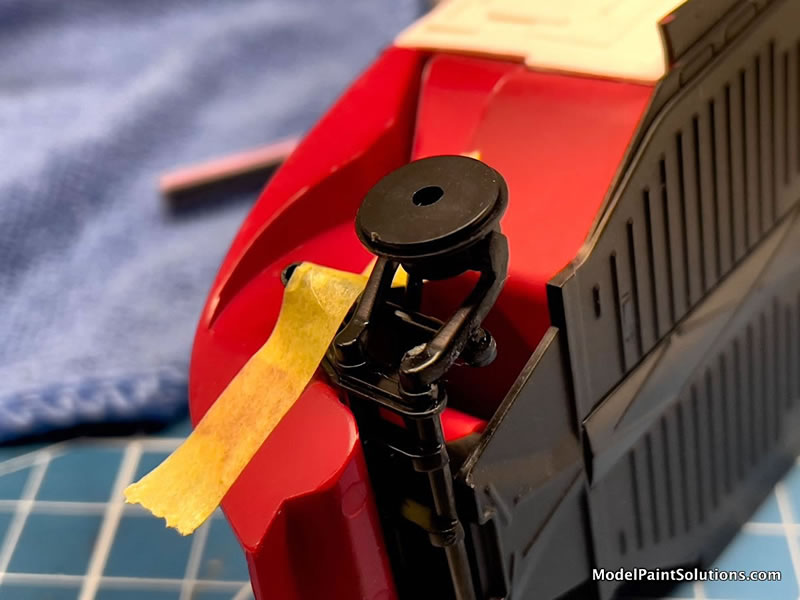
The seatbelts were made by cutting strips of tan masking tape, which I colored with a red Sharpie. One end of each belt was cut to a narrow point so I could feed it through the slot in the photo etch seatbelt buckle, then folded back on itself to connect. The nice thing about using masking tape is that the belt sticks in place by pressing down. It’s very easy bunch it up or turn a bit like 1:1 seatbelts do.
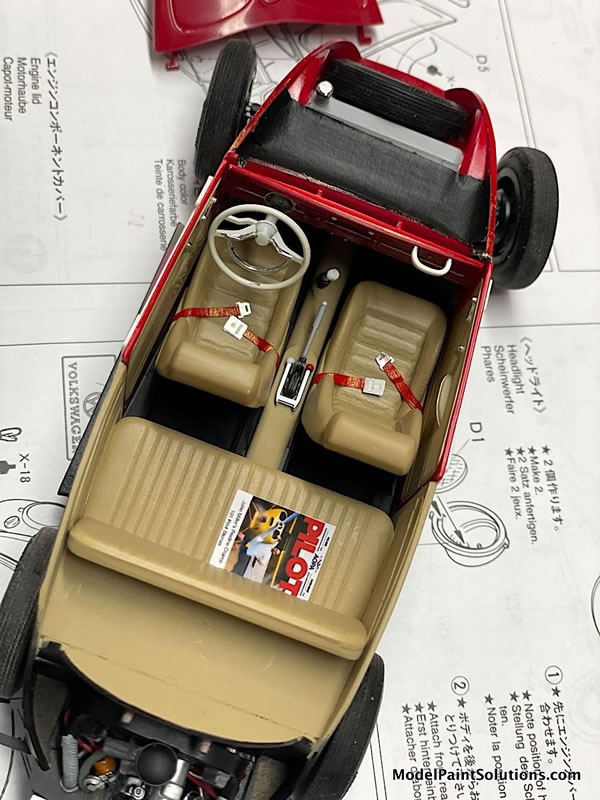
Chrome highlights such door handles, window cranks, and the horn rim on steering wheel were painted with Molotow Chrome using a very fine tip brush.
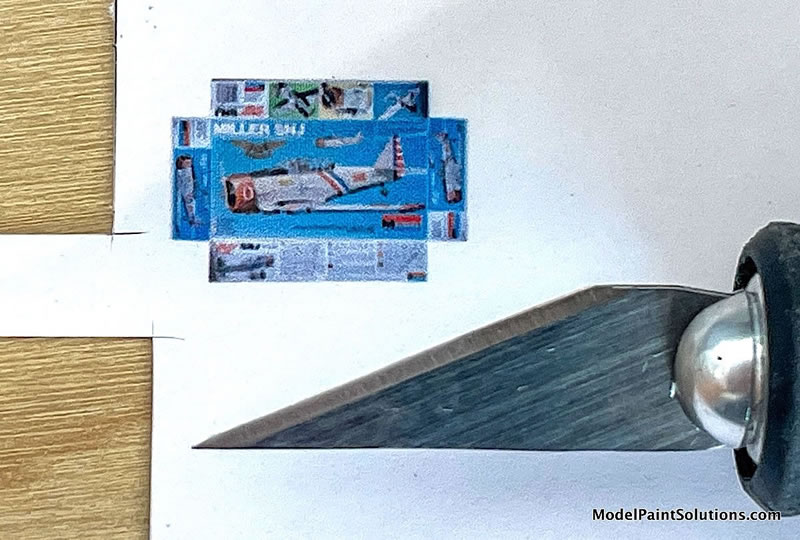
I like putting extra items in a car that personalize it for the future owner of the build. John is an airplane fanatic, so I comped up an AOPA magazine cover with a pic of him standing in front of his beloved 1946 Aeronca Champ. He loves the band, ELO, so there is an ELO album in the car. Just before I completed the kit, someone in our model group sent a link to a “Miller Beer” T-6/SNJ airplane kit boxing. John is a fan of the T-6 so I made a 1/24 scale model kit box which is also included in the interior.
Engine
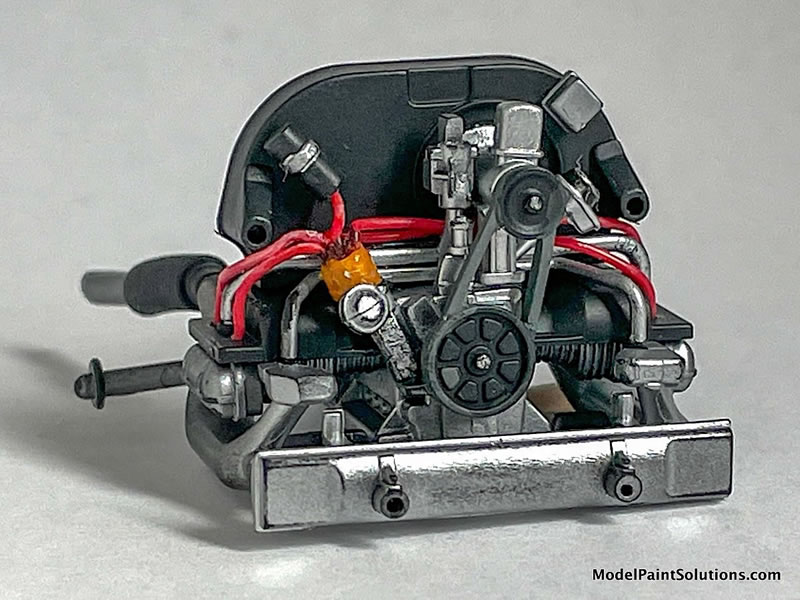
The engine was built fairly box stock. I really like to add spark plug wires to add some sense of reality. John had told us that at some point after having the engine rebuilt, it just wasn’t running right and he took it back to the shop. As John described it, the master mechanic who rebuilt it, opened the engine cover, looked in, and frowned. He then reached back into the engine compartment, grabbed the very cool red spark plug wires that John had installed against his recommendation, and threw them in the garbage. After installing new, stock ignition wires, the engine ran perfectly. Apparently this was a big mistake. So given that info, I had to put red spark plug wires on the model engine!
Chassis/Wheels/Tires
The chassis and many components were sprayed from the rattle can with Mr. Finishing Surfacer 1500 Black. Shake it up quite a bit, put in a container with fairly warm water for a few minutes and you end up getting an amazingly smooth finish. It also makes a great base for other paints such as metallics to detail areas.
The wheels and hubcaps were stripped of their Tamiya chrome and sprayed with Revell Chrom (German spelling) Spray. It’s a great chrome without having a “too shiny” toy-like finish.
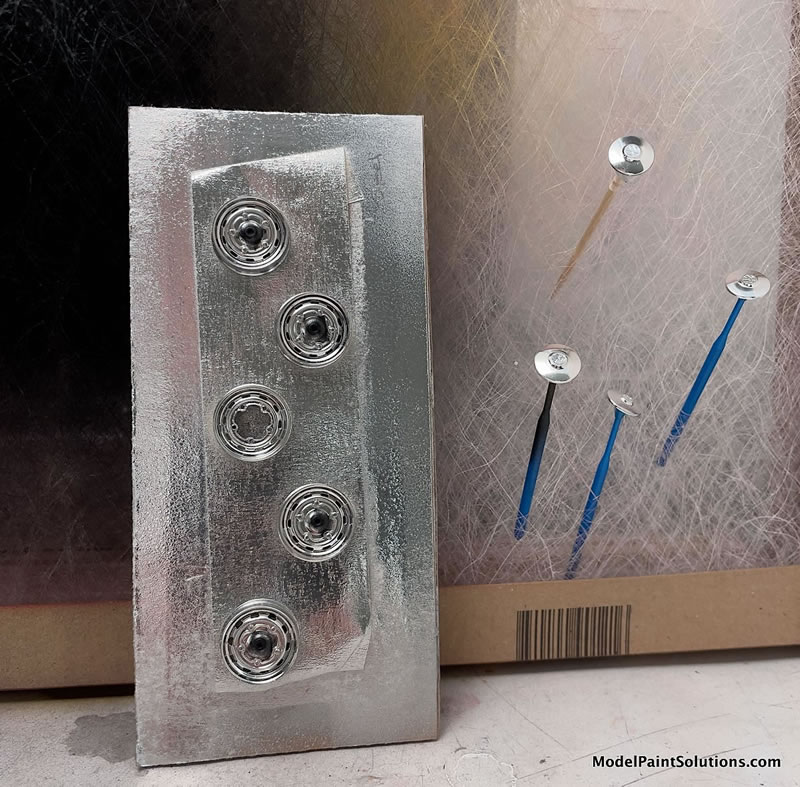
The stock tires were used, but slightly worn down using the wooden balls with a power drill and sandpaper jig that I made. This works well to make the tires actually appear used. I use between 150-400 grit sandpaper or sanding block to achieve a particular look. This process eliminates the ever present seam that runs down the middle of the tread.
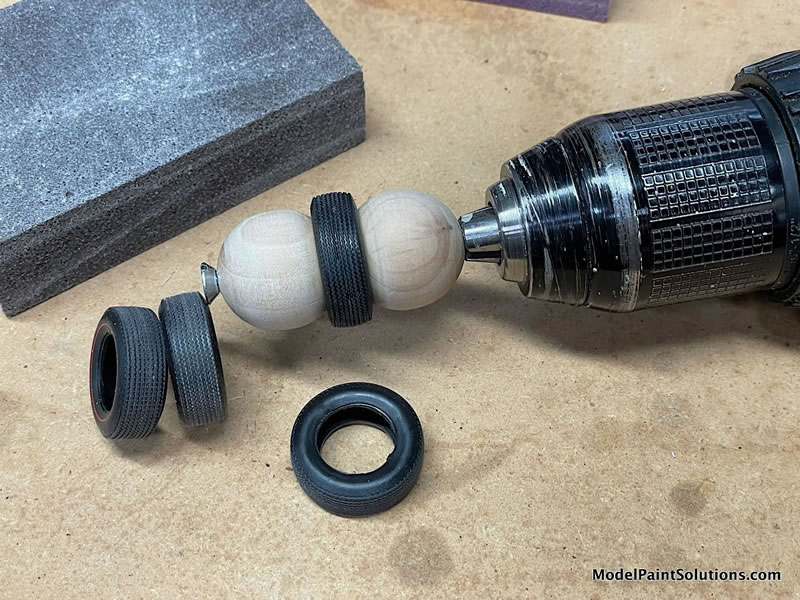
It’s really important to make sure that the wheel/tire assembly is square to the car in all directions unless you want a canted affect. I used a couple of square-sided glue bottles to square up and create pressure while the glue dried.
The Body
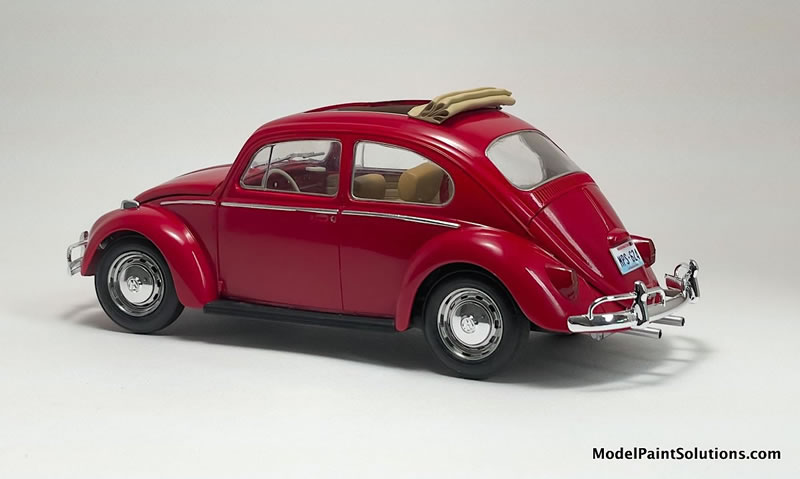
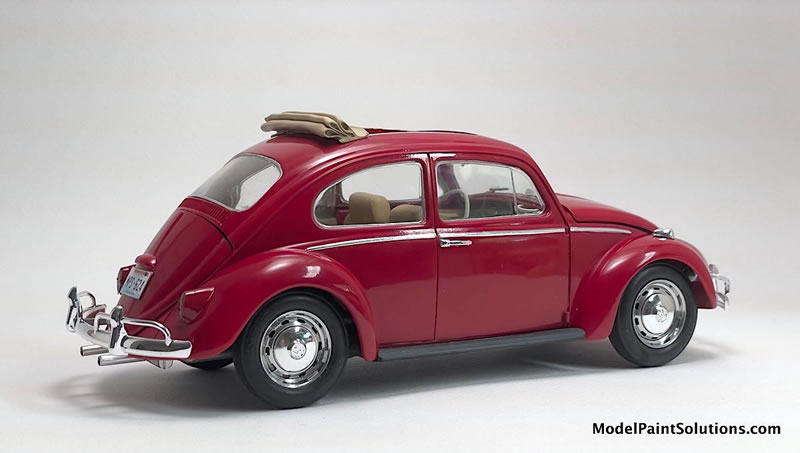
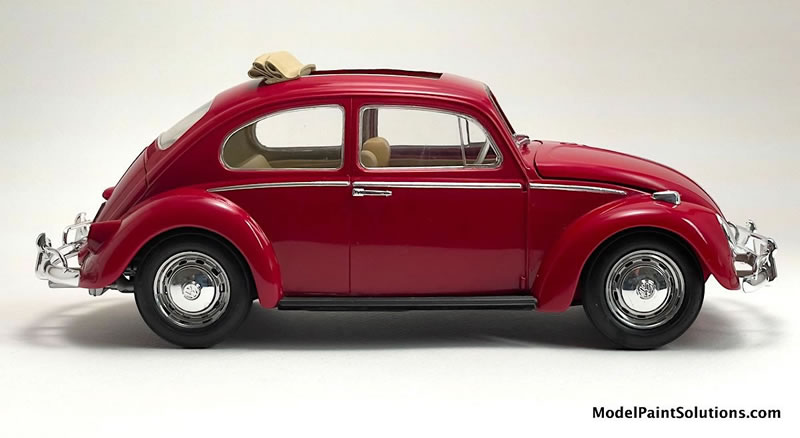
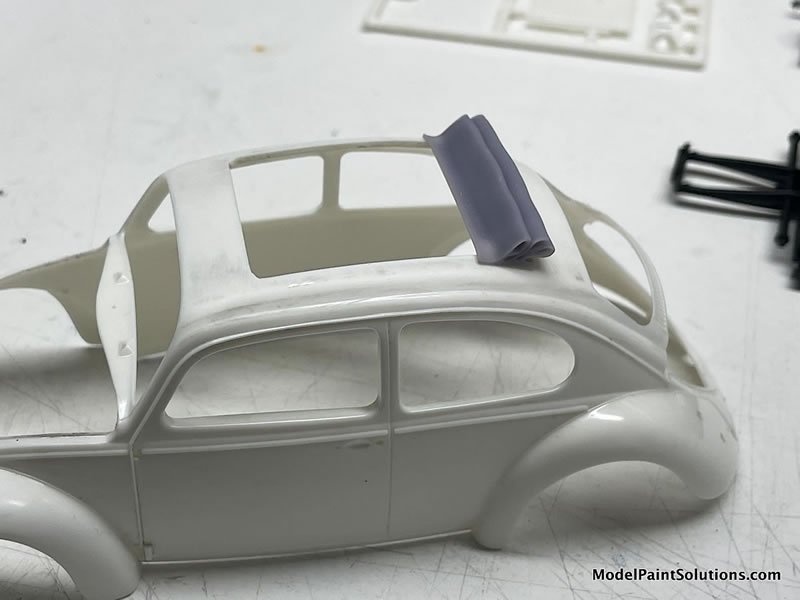
The first thing I did with the body was to attach the cutting guide that came with the 3-D printed retracted soft sunroof. The cutout was done using Holly scribing tools 0.1 and 0.2. It takes a fair amount of time but the scribes and the guide worked perfectly. The retractable soft top was painted the lighter of the interior colors as well. Bare Metal Foil was used to replicate the aluminum slide rails.

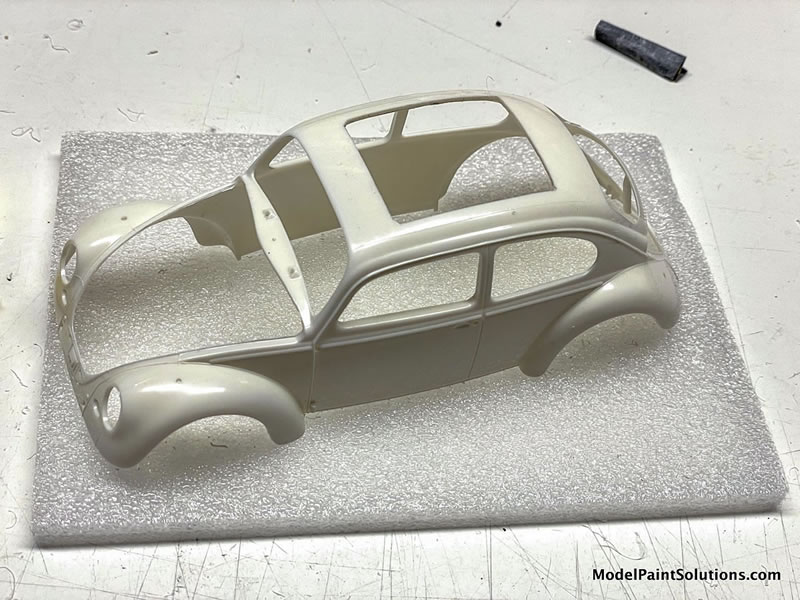

There was a minimal amount of mold seams that needed attention. The whole exterior was very lightly wet sanded with 2000-4000 grit sanding cloth. There were several sinkholes on the inside of the hood and engine cover that needed filling and sanding. All body colored parts were then primed using Splash White Surfacer. It is actually a very light grey tone.

Once dried, the primer was wet sanded using 4000 grit Micro Finishing cloth. The body color was a custom mix from Splash Paints to accurately replicate 1960 Porsche Ruby Red which the 1:1 had been painted during restoration. I used a Gaahleri Mobius .3 airbrush for most of this kit. Small detail pieces were airbrushed using a Harder and Steenbeck Infinity with a .20 needle. Once dried, the body was wet sanded using 4000, 6000, and 8000, Micromesh followed by a couple of coats of Splash 2k Clear. A few minutes after the last coat of clear, I airbrushed a light wet coat of 100% Mr. Color Leveling Thinner. Depending on how the clear went on, you can sometimes watch as the leveling thinner smooths out the finish. When the clear was dry it was wet sanded with the same three grits and then polished with Novus #2 using a soft cotton cloth.
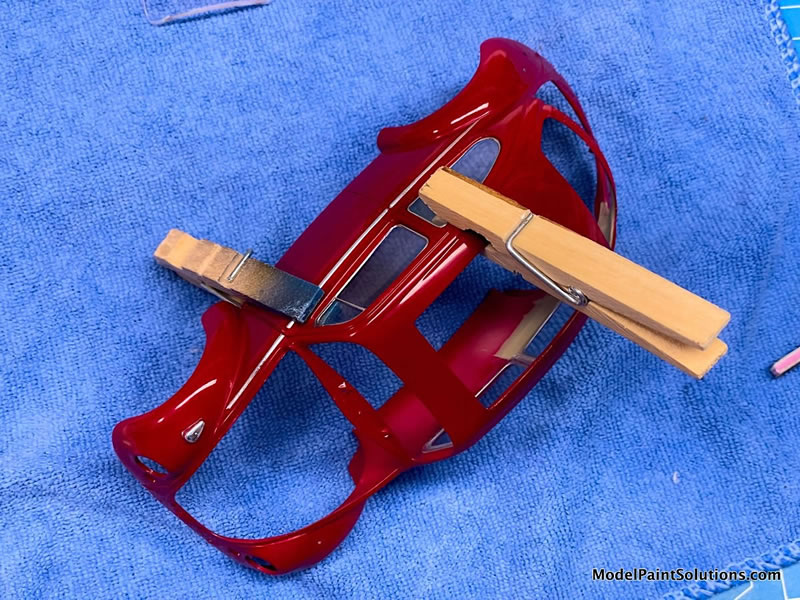
The windows turned out to be something of a challenge; partly because they didn’t lay snug in their respective places. The pressure needed to attempt fitting the body to the chassis completely would cause them to pop free. I had to repair and replace a few times. I was fortunate to not get glue all over them! But, I was never able to get the body all the way down onto the chassis. This was extremely frustrating as I had successfully dry fit all along the way.
Decals
No decals, just the aforementioned photo of the VDO speedometer used on the dashboard. I did use a couple of kit supplied metal VW emblems.
I love the way this VW looks. There are some finished models that just look more realistic than others. This is definitely one of them. The colors look great together, the stance of the car is believable; so many things just worked!! But, best of all was the look on John’s face when he uncovered the model and I told him it was his!
Happy Belated Birthday, John!
Cheers!!
Brad
For more on this review visit ModelPaintSolutions.com.
https://modelpaintsol.com/builds/tamiya-1966-vw-beetle-24136
Text & Images Copyright © 2024 by Brad Huskinson
Page Created 20 September, 2024
Last updated
20 September, 2024
Back to HyperScale Main Page
Back to Reviews Page

|
 Home
| What's New |
Features |
Gallery |
Reviews |
Reference |
Forum |
Search
Home
| What's New |
Features |
Gallery |
Reviews |
Reference |
Forum |
Search